


Select your provider
You can use these instructions to set up email for your Plusnet email address or email for a domain hosted on your account.
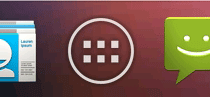
From your home screen open the app drawer.
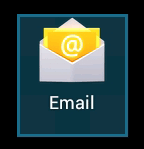
Select Email.
Fill in your Email Address and Password.
If you're not sure what to enter, see below the screenshot for help.
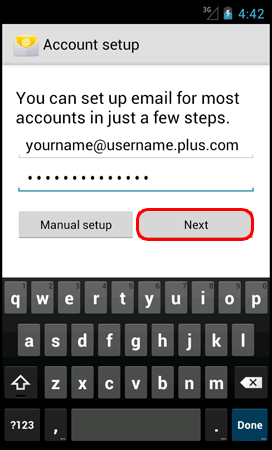
- Email Address: Enter the address you're setting up, this could be a Plusnet address (yourname@username.plus.com) or a hosted domain address (yourname@yourdomain.co.uk)
- Password: Enter the password for your email address (I don't know what this is)
Press Next to continue.
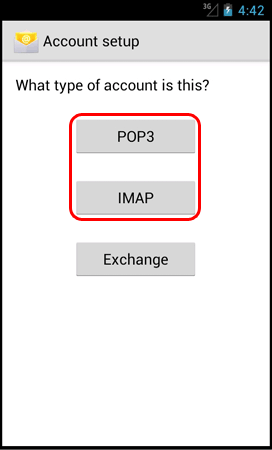
Choose POP3 or IMAP (don't choose Exchange) it's up to you which one you want to use, but for devices with limited memory, we recommend IMAP (I don't know what to choose).
More settings will appear. Some will already be filled in.
Enter the Username and IMAP or POP server details and press Next.
If you're not sure what to enter, see below the screenshot for help.
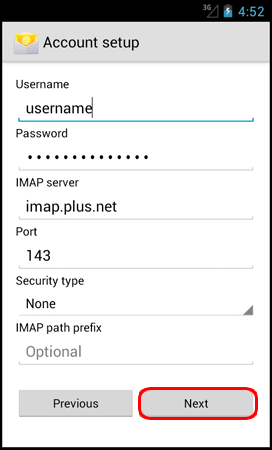
- Username & Password: Enter the username and password for the email address you're setting up (I don't know what these are)
- IMAP/POP3 Server: For IMAP this is imap.plus.net - for POP, this is mail.plus.net
When you're finished, press Next.
Enter the SMTP server and Port.
Make sure Require sign-in is ticked - the Username and Password should already be filled in.
If you're not sure what to enter, see below the screenshot for help.
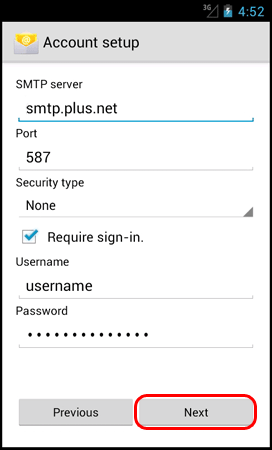
- SMTP server: smtp.plus.net or relay.plus.net (either will work)
- Port: 587
- Username & Password: Enter the username and password for the email address you're setting up (I don't know what these are)
Press Next when you're done.
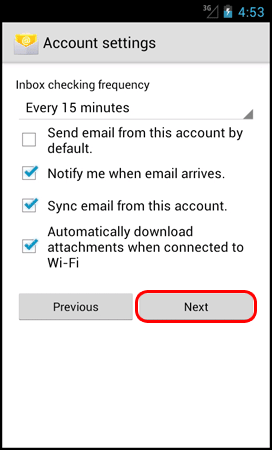
Change these settings to match your requirements (if you're not sure, it's safe to leave them) and press Next.
Finally, enter a name for your account and outgoing messages and press Next.
If you're not sure what to enter, see below the screenshot for help.
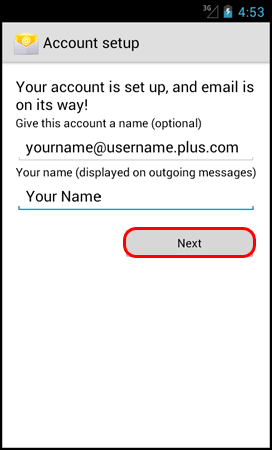
- Give this account a name: Enter a useful description of the email address you're setting up (e.g. Mum's email). You can put whatever you want here
- Your name: Enter your full name (or the name you'd like people to see when you send them email from this account)
Press Next when you're done.
That's all you need to do. Your email should appear on screen and be ready to use within a few minutes.


You can use these instructions to set up email for your Plusnet email address or email for a domain hosted on your account.
From your home screen open the app drawer.
Select Email.
Fill in your Email Address and Password.
If you're not sure what to enter, see below the screenshot for help.
- Email Address: Enter the address you're setting up, this could be a Plusnet address (yourname@username.plus.com) or a hosted domain address (yourname@yourdomain.co.uk)
- Password: Enter the password for your email address (I don't know what this is)
Press Next to continue.
Choose POP3 or IMAP (don't choose Exchange) it's up to you which one you want to use, but for devices with limited memory, we recommend IMAP (I don't know what to choose).
More settings will appear. Some will already be filled in.
Enter the Username and IMAP or POP server details and press Next.
If you're not sure what to enter, see below the screenshot for help.
- Username & Password: Enter the username and password for the email address you're setting up (I don't know what these are)
- IMAP/POP3 Server: For IMAP this is imap.force9.net - for POP, this is mail.force9.net
When you're finished, press Next.
Enter the SMTP server and Port.
Make sure Require sign-in is ticked - the Username and Password should already be filled in.
If you're not sure what to enter, see below the screenshot for help.
- SMTP server: smtp.plus.net or relay.force9.net (either will work)
- Port: 587
- Username & Password: Enter the username and password for the email address you're setting up (I don't know what these are)
Press Next when you're done.
Change these settings to match your requirements (if you're not sure, it's safe to leave them) and press Next.
Finally, enter a name for your account and outgoing messages and press Next.
If you're not sure what to enter, see below the screenshot for help.
- Give this account a name: Enter a useful description of the email address you're setting up (e.g. Mum's email). You can put whatever you want here
- Your name: Enter your full name (or the name you'd like people to see when you send them email from this account)
Press Next when you're done.
That's all you need to do. Your email should appear on screen and be ready to use within a few minutes.
You can use these instructions to set up email for your Plusnet email address or email for a domain hosted on your account.
From your home screen open the app drawer.
Select Email.
Fill in your Email Address and Password.
If you're not sure what to enter, see below the screenshot for help.
- Email Address: Enter the address you're setting up, this could be a Plusnet address (yourname@username.plus.com) or a hosted domain address (yourname@yourdomain.co.uk)
- Password: Enter the password for your email address (I don't know what this is)
Press Next to continue.
Choose POP3 or IMAP (don't choose Exchange) it's up to you which one you want to use, but for devices with limited memory, we recommend IMAP (I don't know what to choose).
More settings will appear. Some will already be filled in.
Enter the Username and IMAP or POP server details and press Next.
If you're not sure what to enter, see below the screenshot for help.
- Username & Password: Enter the username and password for the email address you're setting up (I don't know what these are)
- IMAP/POP3 Server: For IMAP this is imap.free-online.net - for POP, this is mail.free-online.net
When you're finished, press Next.
Enter the SMTP server and Port.
Make sure Require sign-in is ticked - the Username and Password should already be filled in.
If you're not sure what to enter, see below the screenshot for help.
- SMTP server: smtp.plus.net or relay.free-online.net (either will work)
- Port: 587
- Username & Password: Enter the username and password for the email address you're setting up (I don't know what these are)
Press Next when you're done.
Change these settings to match your requirements (if you're not sure, it's safe to leave them) and press Next.
Finally, enter a name for your account and outgoing messages and press Next.
If you're not sure what to enter, see below the screenshot for help.
- Give this account a name: Enter a useful description of the email address you're setting up (e.g. Mum's email). You can put whatever you want here
- Your name: Enter your full name (or the name you'd like people to see when you send them email from this account)
Press Next when you're done.
That's all you need to do. Your email should appear on screen and be ready to use within a few minutes.